Whimsical Wood Blog Pages

Home Page www.whimsicalwood.com

This blog features the current woodcraft, Art and Graphic work of David Stanley.

Tuesday, June 16, 2015

The Tools I Use


The tools I use most for carving are palm tools. Most of this carving is miniature carving, especially welsh lovespoons, and it is  these tools that suit best the way I carve. The work is held in one protectively-gloved hand while the carving tool is manipulated with the other hand. The actual cutting movements, of the edge tool, are made in opposing and assisted relation to the dynamic and reciprocal actions of the work-holding hand. The general working principles remain the same as those pertaining to bench carving, but this method and tools are particularly suited to working at the portable lap-bench I use.

I use a band saw and scroll saw for much of the preliminary work but hand tools do the detail work, in most cases. I have a Dremel but I rarely use it, because it is less convenient to use inside the house, and I prefer the more familiar chisels and knives.

I do intend to develop some skills using rotary tools and make use of them in my carving — one day.

Stubai, Pfeil and Flex-cut  Palm Tools

I use a variety of palm carving tools and while the high quality brands are a pleasure to use and are pretty much ready to use straight off, even the cheapest of the other tools available can be made useful for miniature carving, after some work has been put into improving them. This however can take quite a bit of work — getting them to a usable state, that's why they are cheap! 

But they are cheap enough to experiment with — you can change the geometry of the tool for special uses, and you can do it without jeopardising a more expensive carving tool.

Some of the New Profiles Ground on Cheap Bench Chisels

Even cheap bench chisels can be ground to a round-nose cutting-edge and in this form they function well as gouges. Other shapes can also make useful carving tools when the time is put in to make them razor sharp. It is this sharpness of the edge that enables the tool to do its work. It was discovering this at one time that brought about a massive leap in the interest I had in woodwork and my enjoyment of it. 

All of a sudden, edge tools sliced pleasantly though timber leaving a glisteningly smooth silky wake. Ultra cheap 'carving sets', sets that had convinced me that wood carving was a mysterious dark art, by nature out of my reach, actually performed pretty well now.


Before this discovery of sharp tools, I did once, after again thinking wood carving would be nice to try, buy a single Pfiel carving tool. This tool would have been sharp enough to use straight off. However I could only afford one tool so I chose the most peculiar looking one I could see (deep short bent spoon gouge), thinking that an unusual looking tool must produce unusually good cuts and therefore unusually good work — I couldn't get it to do anything! 

Re-purposed Bench Chisels — Now Bull-nosed Chisels


This particular tool (at bottom) the short bent spoon gouge,together with the other tools shown here are bench tools and are designed to be used with two hands or with a mallet. When I had carved my first lovespoon and then, after a year or two, I had seen just what could be done with lovespoons, especially by David Western who's book on the subject I subsequently purchased, I began to take the carving of lovespoons more and more seriously. 

I could see lovespoon carving as an art form that offers plenty to anyone looking for an expressive and low-cost way of working with wood. A beautiful and worthwhile — though not so lucrative — participant in the parade of human culture, and therefore a tiny, but pointedly pleasant particle of this creation, wherein we live out our present lives under the sun.

I was using the longer handled bench tools for carving these early lovespoons but in the manner described before, holding with one hand  and carving with the other. These tools worked well enough like this but it was obvious that the palm tools would be more ergonomically suitable.


Knives play an important role in the type of carving I have been describing and you could work entirely with knives, however I prefer using gouges and chisels most of the time. Palm tools never-the-less are often used in a manner, and with grips and movements, that relate closely to the way you would use knives. 

To my knives and gouges I have added a number of small home-made chisels and re-purposed tools to accomplish specific tasks, and while I was at it, many experimental tools just waiting for useful employment if the opportunity arises. A proportion of these tools are very useful.., others not so much.

Home-made Tools and Adjustable Graver-handles

Music-wire Chisels and a modified scalpel blade

 Most of these tools are fashioned from music wire with no special treatment apart from hammering, 'grinding' on abrasive papers and the honing and polishing.

Sharpening and Honing Aids

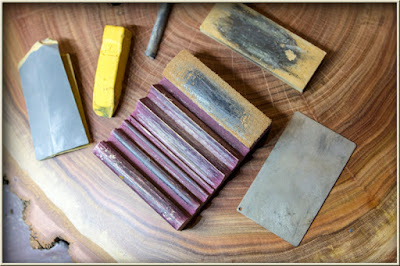
 At my lap bench I keep a few aids for keeping tools well honed during use. A diamond grit 'card' and abrasive papers for 'slightly-serious' repair of an edge and a Flex-Cut honing board and compound for honing. Fine abrasive papers can also be rolled around various diameter dowels to be used as honing slips on the inside edge of gouges.


Scrapers

A few other tools, which overlap the sanding-finishing category are small blades that I use as scrapers. These can be made to cut more aggressively as necessary, by working a fine burr on one edge. A small triangular file can also have the teeth ground off at the end, which is smoothed and polished on each face to make a pointed three-cornered scraper.

Fret and Piercing Saw

Drill and Pin Vice (to make entry holes for inside fretted cuts and pierced carving)

Most of the sawing work I do in the workshop on the band saw and scroll saw, but I also keep a hand fretsaw and adjustable piercing saw at my lap bench. These are useful for any saw cuts needed and for any very fine fretting that requires a jeweller's piercing saw and blades, I have cut a small bird-mouth recess in the bench peg for this purpose. 

A number of needle files, small rasps and rifflers bridge the gap between shaping/carving and finish sanding which I will cover in the next post.


Wednesday, May 27, 2015

Work Holding Bench-Hook and Board


Using palm tools while holding the work in the other hand is very much my preferred working method. However after starting a few carving projects that seemed to call for  heavier cutting and also re-discovering some larger carving tools I had acquired earlier I constructed some work holding aids that would  help with that work.


I have also experimented with using a lighter weight board version, without the bench hook cleats and using it in the hand with palm tools in the usual way or clamped to a small table for very light mallet work  A common and useful method for holding small pieces of relief carving is gluing them to a flat board with a paper joint. However I wanted something that would enable frequent quick release and re-attachment.


The board has a grid of evenly spaced holes that accept screws to position cams that hold the work in place. These cams hold firmly and safely and palm tools can be used while holding the board in the other hand.  However unless you do intend to clamp the board down to a rigid bench, and use a mallet or conventional carving tools using both hands, then I can't see much advantage over totally hand-held.


The bench hook version with a few added cleats and fences also holds the work well using the cams and on a bench top it would do the job for two handed or mallet work.


Sunday, May 24, 2015

Carving Work Station

Before posting step-by-step progress on the several projects I have started. I thought I would begin with my not-so-new-anymore, work-space and later, the clutter of tools that have now encrusted this work-space. I have stayed with the lap-bench idea that I have been happily using for some time now. The overall size of the bench has been increased proportionately all round to gain more work clutter space.


The lap-bench now consists of a torsion box with the part circle cut-out in the centre, the same as before. A bench peg has been added to the centre, as in a jeweller's bench, so that my hand fretsaw and piercing saw can be used when needed. The use of a torsion box construction keeps the weight down and the extra thickness makes for a useful storage opening at each side.


The carving-tool-holding, arc-shaped box at the back, is pierced with openings to hold various carving tools and more holes have been gradually added to suit needs. The front of this tool box/rack is fitted with perspex to allow the tool profiles to be seen — Yes I know.., but it might be a useful idea for someone who agrees with the 'less is more' principle. This is the one paradox that just doesn't work for me. Not with tools, materials, projects, interests or in design! I wish I could add 'useable space' to that list but that would be no paradox just simple contradiction.


The use of this type of bench suits my needs and most usual carving methods very well. Most of my carving is Welsh lovespoons  and other miniature carving work. These projects are first cut to shape with a scroll saw and band saw and then carved with palm tools and knives. With this carving method the work is held in one, protectively-gloved hand and the carving tool is used in the other. The principles involved working this way relate closely to conventional carving but that would take quite a bit of explanation, which I will leave to another time.


One of the great benefits of this set-up is, I can do the bulk of the work with this very portable bench, seated in an arm chair, with the company of family, through the after-dinner hours of television. The addition of an old towel attached under the bench and at the sides, plus being held up at the front with an around-the-neck clip-on strap, collects chips and can fold forward over the work on the bench top at the end of the session. 


A second towel can also be used to cover the whole set-up and when tied up in a parcel, with a length of light rope, the whole lot can be carried away and can easily be transported, as-is, on the back seat of a car for club attendances and shows.


When I am working with this lap-bench at home I can place it on a small folding table drawn up close to the chair. Or if the bench peg is removed, sit the bench across the arms of the armchair. When at a club or other event it is possible to get by with just a chair with the bench across the lap. A second chair or small table is best though. 'Less is more' people could do perfectly well with a smaller version of the bench and just the chair.


For convenient lighting when at home, a folding LED light wedges nicely in place at he side, providing a raking light to carve by. More about this 'painting by shadow' aspect of carving later. That pretty much wraps-up the carving station set-up. I don't do much conventional bench carving with conventional carving tools but I have begun to venture into this a little and have experimented with ways of incorporating these methods with the current set-up, more about this next time.

Monday, May 4, 2015

Re-starting Blog

It hasn't Been my intention to discontinue this blog but here it is dormant for a long time now. So I will throw a few recent and not so recent projects on here just to prime things up a bit in my own mind and see if I can provide something useful. 

I have a few projects that I can post about in the near future where I can show incremental stages of their development, my internal thoughts about the why and how of doing them and their varying successes and failures along the way. I have also just published a Facebook page https://www.facebook.com/whimsicalwoodart but I have no idea how it all works yet.

Welsh lovespoons will probably remain the main subject on this blog but I will be working through a number of diverse projects; other carvings, small decorative clocks, automata and some graphic works.

First a double sided carving of a dragon set on an oak mirror stand enabling the viewing of both sides. The dragon carving sits loosely on a peg enabling it to be picked up and turned. It is titled: The Desolation of Smug with an Ozymandias/Hobbit reference. The Dragon is carved from pittosporum, an Australian native timber and finished with polyurethane and wax.


The Dragon is perched on a gold hoard.

The dragon is a fossil and the gold has been taken.


 The carving began as a smug looking dragon.


And the desolation side was drawn directly on the block and then carved.


The polyurethane and wax finish has proved to be an economical one in every sense except physical effort. Just one very thinned down coat of polyurethane then the waxing, often in a one sitting process. It seems durable enough for the purpose and enhances the timber with no visible coating.

I will outline the whole process in detail when I reach that stage in the next full described carving project.

Here is the latest Welsh lovespoon carving. It is a panel style lovespoon showing elements of the James family crest, a celtic knot heart, a kentia palm leaf and a daffodil. This lovespoon is carved from rock maple and finished with polyurethane and wax.


And one from last year, a more complex lovespoon carved from New South Wales Rosewood and finished with polyurethane and wax.


Finally a coloured pencil drawing on grey mount board from the same image earlier used for a pyrography work. I am planning on more coloured pencil drawing in the future but I'm still experimenting with this medium.